17 January, 2015

Dam Good Cake!!

When I was growing up there was this cake...I should just call it "Voldemort Cake" but...that would be too odd.  But it was called "Better Than Sex Cake" when I was growing up.  The first time I heard the name of this cake the woman that was serving it was serving it at a church function and she wouldn't even speak the word "sex" above a whisper which made me laugh even back then and makes me think of "He Who Must Not Be Named" now that I am an adult and then I laugh at both.  Now...being married for 9 years and having had the cake, I can tell you...it isn't better than sex however, it IS damn good cake.  There is no denying that.  

I wonder who came up with that ridiculous name??  Usually I research my recipes but I am almost embarrassed for whomever named that cake lol...she/he was obviously a deprived individual lol...  I have to change the subject or it will veer severely to the left field and become a "how to" post for something that is NOT cake if I am not careful lol.. 

Moving on...

The overwhelming majority of these recipes begin something like this...

1 box devil's food cake mix
1 jar of caramel ice cream topping

I'm going to stop RIGHT there.  There is NO reason to do that!  There are plenty of made from scratch cake recipes that are SO awesome that they leave box mixes in the dust!  On flavor every time, but on this recipe...on ease as well.  It isn't hard to make a wonderful cake from scratch at all.  You just have to be committed before going into it.

Then there is the caramel sauce that gets mixed with a WHOLE can of sweetened condensed milk.  Store bought sauces are so convoluted these days, I mourn for the people who choose to buy them instead of just make them at home.  Homemade ALWAYS tastes better.  Always.  Period.  The cake and caramel sauce for this cake are worth making yourself and I promise...you'll never use a box mix for Devil's Food Cake again.  Ever.  I would hope that you'll never use a store bought caramel sauce after this recipe just based on the extra preservatives and JUNK that is added to the store bought sauce.  But, there are some folks that just aren't scared by that stuff or grossed out by it.  

Let's get started.

Dam Good Cake
1 recipe of caramel sauce
1 can organic sweetened condensed milk
1 tub TruWhip organic whipped topping
1-2 c. Heath or Skor toffee bits
1 recipe of Devil's Food Cake

Devil's Food Cake
4 oz. unsweetened organic baking chocolate (Camino is good)
1/4 c. Callebaut cocoa powder
1 1 /4 c. boiling water
3/4 c. flour ( I use King Arthur Flour )
3/4 c. cake flour ( I use King Arthur Flour )
1 tsp. baking soda
1/4 tsp. sea salt
2 sticks of organic unsalted butter
1 1/2 c. packed organic brown cane sugar
3 large organic cage free brown eggs
1/2 c. sour cream or goat yogurt (makes a difference!!)
1 tsp. vanilla paste


Preheat oven to 350 F

Grease a 15 x 10 inch glass cake dish with butter and line bottom of the pan with parchment paper as well. 

Combine the unsweetened chocolate and cocoa in a bowl and pour the boiling water over them and whisk until it is smooth. Sift together the flours, baking soda, and salt onto large sheet parchment or waxed paper and set it aside.

Place the butter in the bowl of your stand mixer and beat at medium speed until creamy and then add brown sugar and beat on high until it is light and fluffy. Stop mixer and scrape down bowl with rubber spatula. Increase speed to medium/high and add eggs one at a time, beating about 30 seconds after each addition. Reduce speed to medium and then add your sour cream/goat yogurt and vanilla and beat until well combined. Stop the mixer and scrape down bowl again. With mixer on low, add about one third of flour mixture, followed by about one half of chocolate mixture. Repeat, ending with flour mixture and then beat until just combined. Do not overbeat. Remove bowl from mixer; scrape bottom and sides of bowl with rubber spatula and mix gently to thoroughly combine.

Turn batter out into the baking pan and bake for 35-45 minutes checking it with a toothpick at 35 minutes and every 5 minutes after that until a toothpick inserted comes out clean.

While cake is baking make your caramel sauce to mix with the sweetened condensed milk for the poke holes.

Caramel Sauce
1/2 c. packed organic brown cane sugar
1 T. cornstarch
1/3 c. whipping cream
2 T. organic corn syrup or brown rice syrup
1 T. organic unsalted butter
1/2 tsp. vanilla paste or vanilla extract
1/4 c. water

In a small, heavy bottomed saucepan combine sugar and cornstarch.


Then stir in the water and turn the burner on to medium heat.  After that has heated up a little bit and then add in the cream, syrup, and butter.  I always use brown rice syrup rather than corn syrup.


Cook and stir it until bubbling (it might even look like the cream is curdling).  Cook, constantly stirring, for two more minutes.  Remove from the heat and stir in the vanilla paste/extract.


The sauce is done, now you need to add the can of sweetened condensed milk to the caramel sauce...


Your cake should be done baking by now....


 While the cake is still warm out of the oven grab a wooden spoon or dowel (something with a small round end on it...but larger than a toothpick of course...) so you can poke holes into the cake to pour the sauce into...


Poke holes in a pattern or at random...it really doesn't matter how you do it...let the children help if they are old enough!  This is the perfect cake to turn the children loose on.  Once the holes are in the cake, pour the sauce all over the top making sure you allow it to get into all of the holes.


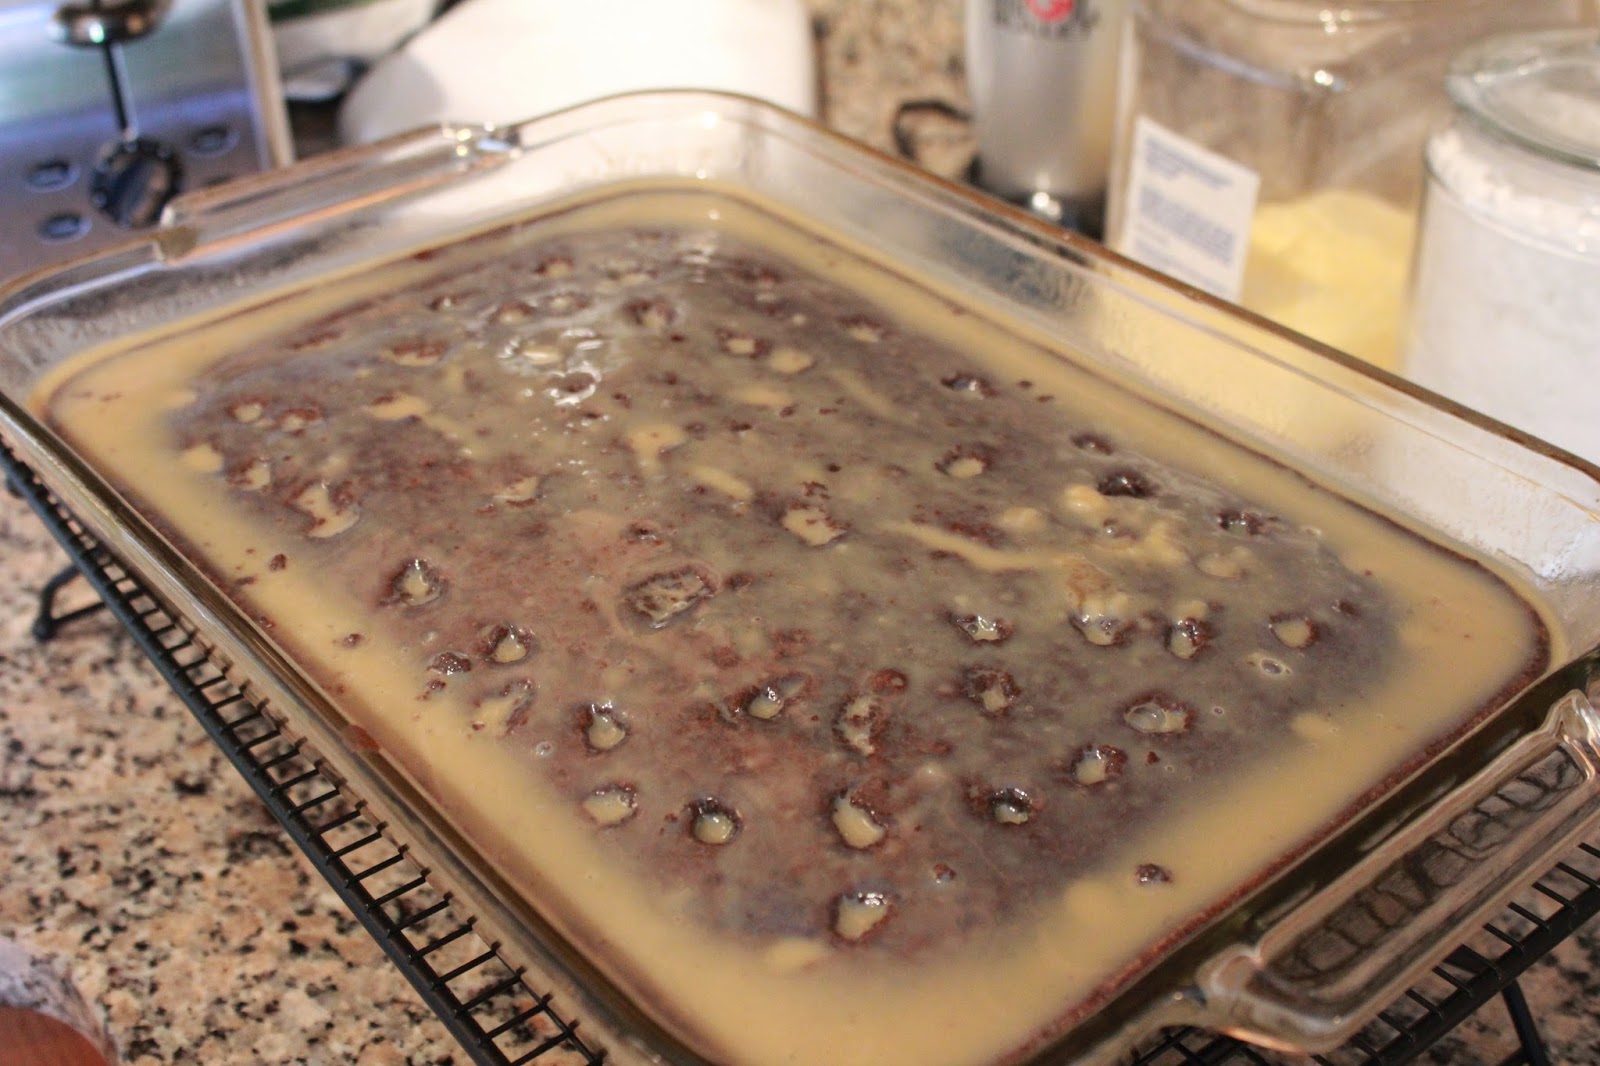
Now...no matter how many times I tried to top those holes off....it didn't stay, but I found out later it didn't need to....those holes were filled alright!  Filled just right...  At this stage the cake needs to cool to room temperature completely and then be refrigerated for 1 hour before adding one tub of whipped topping to the top of the cake.  Once you add the whipped topping (I used TruWhip...it is organic but not too hard to find in places that are regular grocery stores.  Even our base commissary carries it!) sprinkle on as many or as little toffee bits as you like.


 After doing this..and subsequently trying the cake, I've decided I would be more conservative with the toffee bits next time or leave them off completely.  It felt like an odd texture when it was paired with everything else.  But that was just me, the Mister LOVED it...he was devouring a slice last night in BED lol...a sure sign of true love with him.  He thinks I should keep the toffee on...I told him I can sprinkle it on the cake on a slice by slice basis in the future.  He seemed to be okay with that notion lol

 
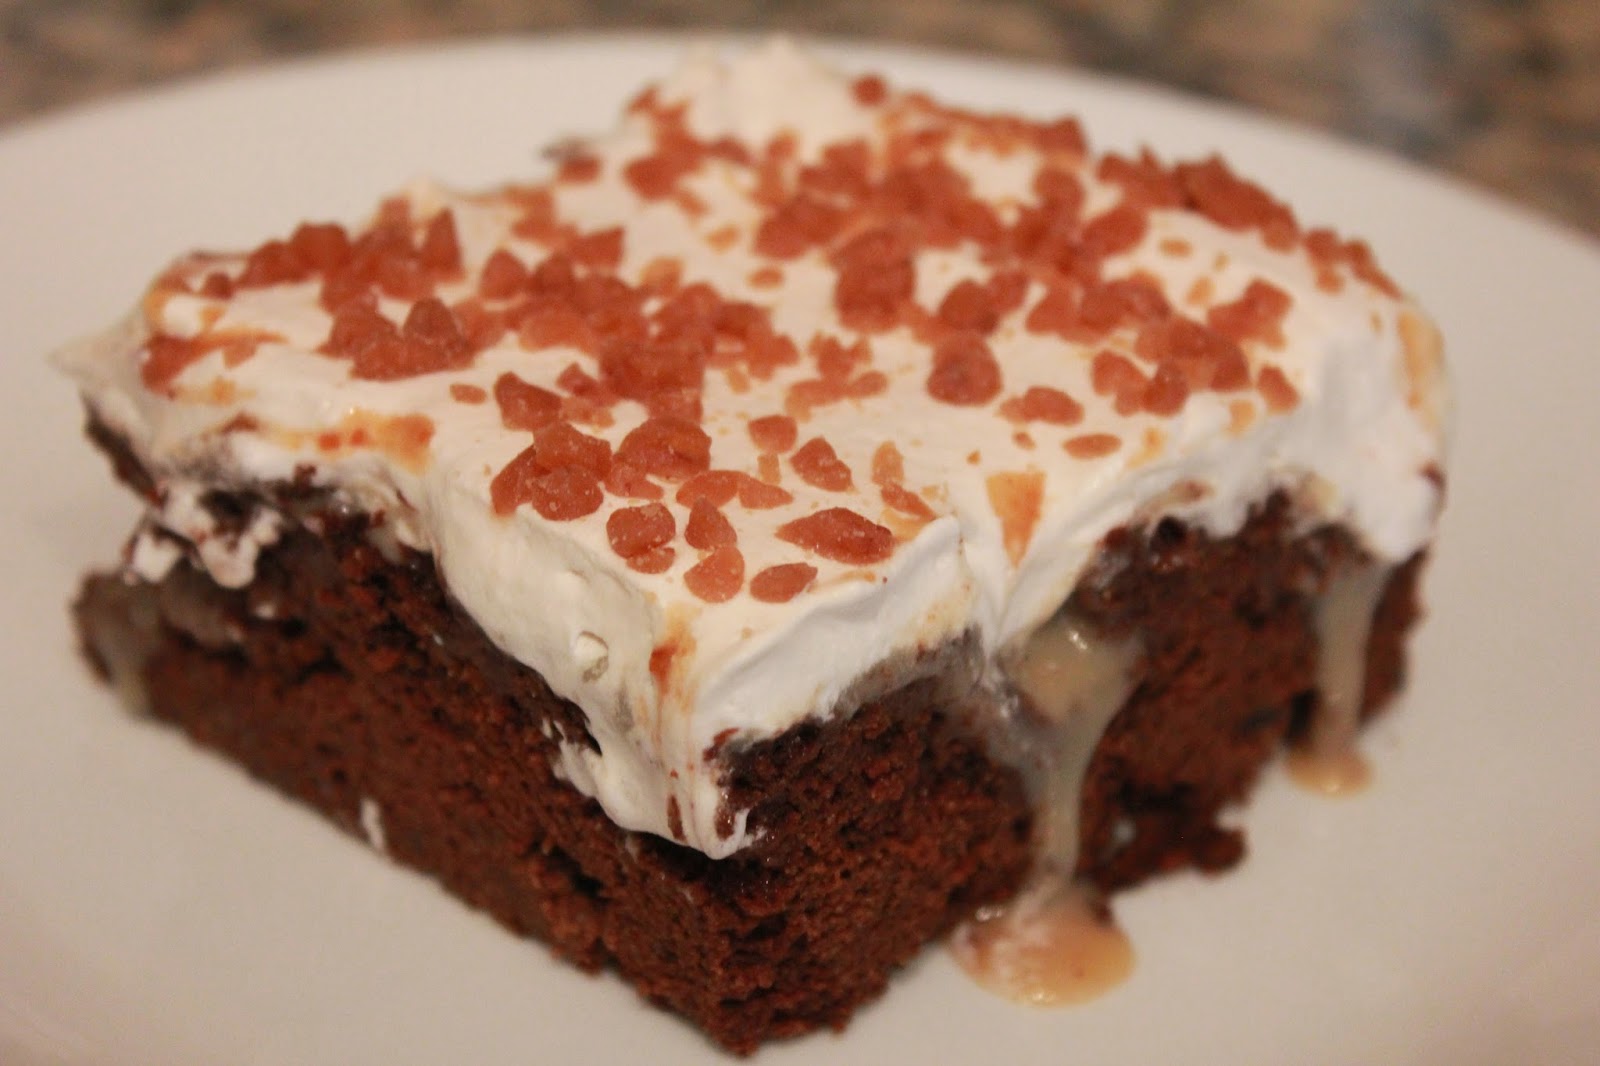
When you fork into this cake you are enticed with every bite by the sweet, sticky caramel sauce and super moist...and tender devil's food cake to go right ahead and take another bite, and then another...and another lol...  Better than sex?  Uh...not in my opinion.  But...it IS damn good cake.  On that my husband and I both agree.  Happy baking!!

10 January, 2015

Best Lemon Bars EVER!!

We had this heat wave hit us back at the end of October that threw me for a loop when we were seeing temps hit the high 70's for most of the second to last week of the month, and even one day it hit 82.  No bueno.  Where was my autumn?  I dealt with this heat the only way I knew how...lemons...  Sure, that sounds odd but, think about it.  You'll get there eventually.  
While you're making that connection in your mind about how lemons can help you cool down, I'mna give you the BEST recipe for lemon bars I've ever used.  I use it in the summer primarily because it is a bar you serve cold however....if there are enough people in the house that turn up ill, I whip out this recipe and force feed lemon bars to the sick people in my home.  Why?  Because I always add real lemon oil to this recipe.  Lemon oil has the ability to cleanse your body of toxins, supports the sympathetic nervous system, and it stimulates your immune system to respond when it is under attack.  Lemon bars should be eaten year round lol....or at least add lemon oil to your water every day.  But, I vote lemon bars for everyone!!

This recipe is super easy as far as making it and it isn't time consuming for those of you with littles.  This can be made dairy free without any issues.  Substitute the butter for vegan butter and substitute the whole milk for unsweetened soy milk.  Flavor doesn't suffer a wink!  It is all about the depth of the lemon flavor and the texture of the shortbread on the bottom.

Lemon Bars

Shortbread Crust
1 3/4 c. flour
2/3 c. organic powdered cane sugar
1/4 c. cornstarch
3/4 tsp. sea salt
1 1/2 sticks of unsalted butter

Lemon Filling
4 large organic cage free brown eggs (taste is way better!)
1 1/3 c. organic cane sugar
3 T. flour
1 tsp. lemon oil
2/3 c. lemon juice
1/3 c. whole milk
1/8 tsp. sea salt

Preheat oven to 350 F

Grease the edges and part of the bottom of a 9 x 13 inch cake pan, then line the bottom with parchment paper.


In the bowl of your stand mixer whisk together flour, salt, cornstarch, and sugar then attach the bowl to the machine and blend in the butter.

  
When the mixture looks like yellowish colored crumbs pour out the mixture into the bottom of the greased pan and pat it into the pan firmly.
  

Put it in the fridge for 30 minutes, then into the oven and bake for 20 minutes.

While the crust is baking in your stand mixer whip (with your stand mixer whisk) the eggs for a little bit, getting some air into them.  Then add in the sugar and wait for it to gain a bit more volume.  After 3 minutes add in the flour, lemon oil, milk, and sea salt.  Let it whip for 10 minutes or so.  It will help the sugar not settle to the bottom before you turn it out into the pan.

When the timer goes off on the crust, remove the pan from the oven and turn the temperature down to 325 F.  Then pour the lemon filling on top of the crust and carefully return it back to the oven.

Bake the bars for 20 more minutes or until the middle of the pan doesn't jiggle anymore when you touch the pan.  Allow the bars to cool on a wire rack completely before dusting the bars with additional organic powdered cane sugar.


***If you aren't serving them right away skip sprinkling the sugar on them and instead store them in the fridge until you're ready to serve them.  Right before serving them, sprinkle them with powdered sugar.  Sometimes bars WILL absorb the sugar because of possible condensation gathering on the top of the bars.  Eventually the lemon filling will stop absorbing the sugar.  Just keep sprinkling it lol... Trust me.


And YES! you see a metal pan in that picture up there ^^^ and a glass pan in the photo above that one.  I made these bars twice in the 3 days it took me to get these photos onto my laptop and write out this entry lol...  Nothing should be more convincing to you about how great this recipe is!


O emmm geee!!  These are some of the best lemon bars I've ever had...hence the name.  They shortbread on the bottom is PER-fect!  It is snaps juuuuust a bit with you take the initial bite but it just melts in your mouth as you eat.  The lemon oil takes the lemon flavor to a new level...a place where I've never been with a lemon bar quite frankly.  I can't imagine ever finding a recipe I like better.  I just refuse to believe it will happen.  They are a refreshing tid bit to have with a cup of tea or as a palate cleanser after a meal like fajitas or some great Indian or Thai food.  It really helps clear the deck with spicy foods that normal park it on your tongue after you eat them.  Trust me, you'll fall in love with this recipe and be sharing it at all of the potlucks and picnics before too long.  Enjoy!

03 January, 2015

Ya Mon!!

Ah yes...we've come to the time of year when everyone (except me) wishes they were on some remote tropical island sipping something with a straw in it, eating exotic fruits by the truckload, and partaking in any one of a dozen warm climate region fabulous cuisines.  I LOVE being cold.  I'd rather be cold than hot ANY day.  But not many people I know share that sentiment.  I know more snowbirds that skidaddle down to Arizona for the whole of Minnesota winter (which sometimes lasts until June...) than I know folks that would do the Polar Plunge.  To each their own...

One meal I regularly end up announcing on my Facebook page that I am making for dinner is Jerk Chicken and Coconut Rice.  Everyone says it sounds wonderful, but I honestly can't remember a single person asking for the recipe.  I already know why....they assume it is time consuming.  Ha!  Not even close.  In fact, when I can't figure out what to make for dinner and it is already 2pm I know I can marinate this chicken for a couple hours and soak my rice that whole time and flip on my burners at 4:30 and dinner will be on the table by 5pm without batting an eyelash.  The biggest dilemma I have once I decide to make this meal is what vegetable to serve with it that the children will actually eat.  They eat the chicken and the rice but...the accompanying veggie is always a toss up.  We went with carrots this time....it went over with mixed results.  Let's get started...the chicken has to soak in the marinade for at least 2 hours.  Over night is great, but not even close to necessary.  Over night just ensures full breach on the "soak in" factor, but 2 hours gets the job done well enough that people want seconds on their chicken...even the toddler.

Jamaican Jerk Chicken
3 lbs. of organic chicken (I ALWAYS use chicken thighs for this!)
6 chopped scotch bonnet peppers (habaneros)
2 T. dried thyme
2 T. dried allspice
8 cloves of garlic, minced
3 white onions, chopped
2 T. sugar
2 T. salt
2 tsp. ground black pepper
2 tsp. cinnamon
2 tsp. ginger
2 tsp. nutmeg
1/2 c. extra virgin olive oil
1/2 c. soy sauce
juice of one lime (3 T.)
1 tsp. lime oil
1 tsp. orange oil
1 c. orange juice
1 c. white vinegar

Roughly chop the onion, garlic, and scotch bonnet peppers and then toss ALL of the ingredients in a magic bullet or blender type appliance.  Turn it on and let it go until you have completely liquified the whole mixture.

Put the chicken into a gallon freezer ziploc bag and pour the marinade over the chicken.  Squeeze all of the air out of the bag, seal it, and pop it in the fridge for at least 2 hours.


 At least 1 hour before you plan on serving dinner, preheat the oven to 325 F, remove the chicken from the fridge to bring it closer to room temperature before cooking, and get the coconut rice started so everything is done at the same time.

NOW...typically this coconut rice dish is known as "rice and peas" and by "peas" they mean red kidney beans.  My Sprout, however, wants nothing to do with those so I haven't put them in my coconut rice for years now.  The last time I served it "properly" was when our folks were visiting us in Canada, over a year.  Moving on...

Coconut Rice
3 c. rice
2 cans of organic coconut milk
1 can of coconut water
3 c. of water
5 cloves of garlic, minced
1 uncut scotch bonnet pepper
3 scallion stalks
2 tsp. salt
1 tsp. black pepper
1 T. extra virgin olive oil
2 sprigs of fresh thyme

Toss all of the ingredients in the pot on medium heat and let it come to a gentle boil, stirring it occasionally.


I am sure you can tell by looking at the photo that there isn't a scotch bonnet pepper floating in the pot.  Yes, another component that the children won't tolerate well.  For whatever reason, they don't seem to mind the heat from the marinade on the chicken, but when I made this rice with a pepper once they spit it out and said it was "too spicy".  Yeah, the pepper wasn't even sliced into and it made it too spicy.  Oh well..

While that is doing its thing, it is time to flash fry the chicken.  Get the cooking area ready by putting the bag of chicken on a paper town so as you move them with tongs from the bag to the hot pan you don't drip the oily, spicy marinade all over the counter.


Put a small amount of olive oil in the bottom of the pan on medium heat, and then put each chicken thigh in the pan, top side down.  You want to flash fry it at a fairly high temperature to create a loverly caramelization with the sugars in the marinade.


Once the tops are cooked, cover the whole pan with a sheet of tin foil and toss it in the oven to finish.  Make sure that you are using a pan that is ALL metal so nothing melts when you put the pan in the oven.  It needs to have a metal handle to be safe....and then PLEASE remember to use a HAND MITT or something to avoid burning yourself!


Allow the chicken to braise in the oven for 15-20 minutes then remove to cool slightly before serving.  Keep it covered while it cools to prevent the meat from drying out as it rests.  The rice should be finished at about the same time.  Remove the scallions and the sprigs of thyme before serving.  When I am serving this for dinner and there are more adults than children to consider I serve this with a mango salsa over top of the chicken to add a fresh component with a beautiful flash of color.  But lol...for now because we're feeding the 4.5 year old and the 18 month old...we're going with carrots.  Which the 18 month old didn't touch and the 4.5 year old had to be bribed to consume.  *sigh*  I've mentioned how much I love being a mother, right??


When I make this meal I purposefully make SO much of it that there is enough for leftovers for days and lunch for the Mister as much as he decides he wants it.  When I eat my dinner I take a bite of the chicken with a bite of the rice.  The two components together in every bite is almost...orgasmic.  When my Dad and Momma2 were here last month she asked for the recipe.  When my Momma and step dad were here the month before them...my Momma wanted the recipe.  Last year when our other folks were here, they wanted the recipe as well.  I don't think I've fed this meal to a single person that didn't want it again and didn't get the recipe before they left our home.  It is pretty addicting.  I'm not kiddin...it is almost 11pm as I am typing this out and I am convincing myself that it is "only 30 minutes" to make a batch of the rice and that it is totally doable....and I should just hurry up and go make a batch.  Man...I love that rice lol...  Hello my name is Foodnatic, and I am a Jamaicaholic...  One addiction I don't mind having.  I'll apologize now for getting you hooked.